In today’s interconnected world, having control over your Wi-Fi network is crucial for security and managing bandwidth usage. In this blog post, we will explore various methods and techniques to turn off Wi-Fi access for certain devices on your network. Whether you want to limit access for specific devices or temporarily disable Wi-Fi for certain users, this guide will provide you with step-by-step instructions and tips to achieve your desired level of control.
Introduction
In an age where almost every device is connected to the internet, it’s essential to have control over your Wi-Fi network. By turning off Wi-Fi access to certain devices, you can enhance security, manage bandwidth effectively, and ensure a smooth network experience for all users.
There are several scenarios where disabling Wi-Fi access to specific devices can be useful. For example:
- Parental Controls: As a parent, you may want to restrict your child’s access to the internet during specific hours or block certain websites.
- Bandwidth Management: If you have limited bandwidth and want to prioritize certain devices or activities, turning off Wi-Fi access to other devices can help.
- Security: If you suspect that a particular device on your network is compromised or posing a security threat, disabling its Wi-Fi access can prevent further damage.
- Guest Networks: If you have a guest network set up on your router, you may want to restrict certain devices from accessing it.
In the following sections, we will explore different methods and techniques to achieve these goals.
Understanding Your Wi-Fi Router Settings
Before we dive into the methods of turning off Wi-Fi access to certain devices, it’s essential to understand how to access and navigate your router’s settings.
- Router Models and Interfaces: There are numerous router models available on the market, each with its own interface for accessing settings. Generally, you can access your router’s admin panel by typing its default gateway address into a web browser. The default gateway address is typically mentioned in the router’s manual or can be found by running the ipconfig command in the Command Prompt or Terminal.
- Accessing the Admin Panel: Once you have identified your router’s IP address, enter it into the address bar of your web browser. You will be prompted for a username and password. These credentials are usually mentioned on the router itself or in the manual. If you have changed the default credentials, use the updated username and password.
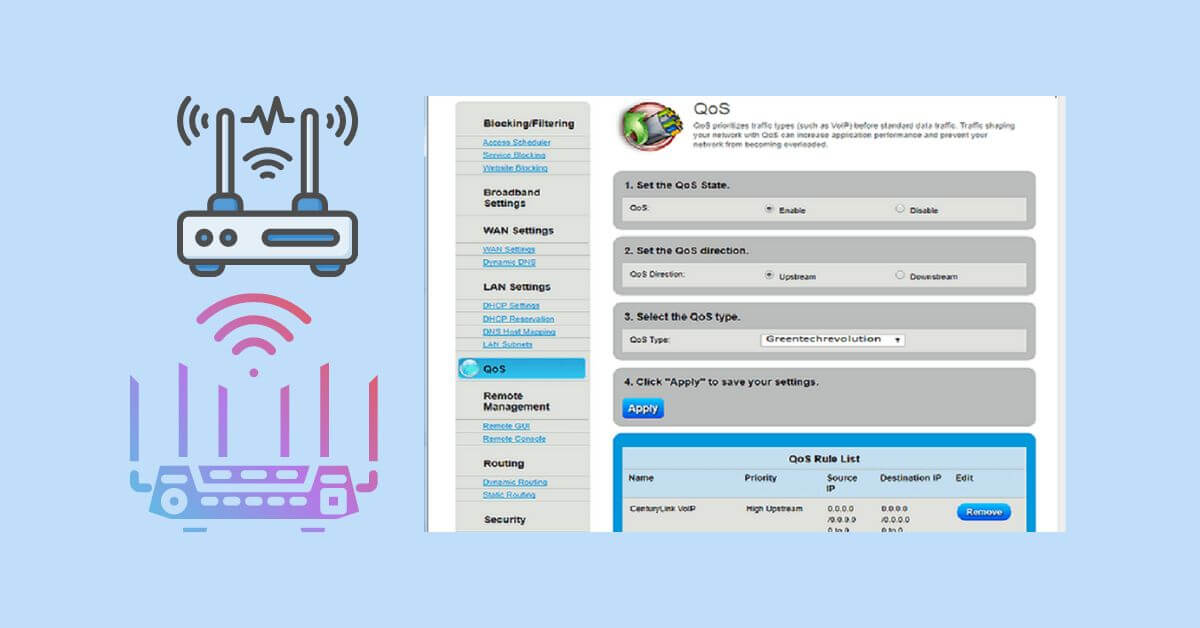
- Overview of Settings: Once you have successfully logged into your router’s admin panel, you will see a dashboard with various settings. Look for options related to network settings, security, or advanced settings. It’s important to note that the terminology and layout may vary depending on your router model.
Method 1: MAC Address Filtering
MAC address filtering is a method that allows you to control Wi-Fi access based on the unique MAC addresses of devices. A MAC address is a unique identifier assigned to network interfaces by manufacturers.
Here’s how you can set up MAC address filtering on your router:
- Find MAC Address: Before setting up MAC address filtering, you need to find the MAC address of the device you want to restrict. You can usually find this information in the device’s network settings or by running a command like ipconfig /all in Windows Command Prompt or ifconfig in Terminal for macOS or Linux.
- Access Router Settings: Follow the steps mentioned earlier to access your router’s admin panel.
- Enable MAC Address Filtering: Once in the router settings, look for an option related to MAC address filtering or access control. Enable this feature.
- Add MAC Address: In the MAC address filtering settings, there should be an option to add MAC addresses manually. Enter the MAC address of the device you want to restrict and save the changes.
- Test Access: After saving the changes, try connecting the restricted device to your Wi-Fi network. It should no longer have access.
MAC address filtering provides a relatively simple method for controlling Wi-Fi access to specific devices. However, it’s important to note that MAC addresses can be spoofed, so this method may not be foolproof against determined individuals.
Method 2: IP Address Filtering
IP address filtering is another method of controlling Wi-Fi access based on device IP addresses. An IP address is a unique identifier assigned to each device connected to a network.
Here’s how you can set up IP address filtering on your router:
- Find IP Address: Before setting up IP address filtering, you need to find the IP address of the device you want to restrict. You can usually find this information in the device’s network settings or by running a command like ipconfig in Windows Command Prompt or ifconfig in Terminal for macOS or Linux.
- Access Router Settings: Follow the steps mentioned earlier to access your router’s admin panel.
- Enable IP Address Filtering: Once in the router settings, look for an option related to IP address filtering or access control. Enable this feature.
- Add IP Address: In the IP address filtering settings, there should be an option to add IP addresses manually. Enter the IP address of the device you want to restrict and save the changes.
- Test Access: After saving the changes, try connecting the restricted device to your Wi-Fi network again. It should no longer have access.
IP address filtering provides more flexibility than MAC address filtering as it allows you to control Wi-Fi access based on IP addresses assigned by your router’s DHCP server. However, keep in mind that IP addresses can change dynamically unless you assign static IP addresses to specific devices.
Method 3: Using Parental Control Features
Most modern routers come with built-in parental control features that allow you to restrict internet access for specific devices or users during specific hours or block access to certain websites altogether.
Here’s how you can enable and configure parental controls on your router:
- Access Router Settings: Follow the steps mentioned earlier to access your router’s admin panel.
- Enable Parental Controls: Once in the router settings, look for an option related to parental controls or access restrictions. Enable this feature.
- Set Time Restrictions: In the parental control settings, you should find options to set time restrictions for specific devices or users. Specify the hours during which you want to block internet access and save the changes.
- Block Websites: If you want to block specific websites altogether, look for an option to add website URLs to a blacklist. Enter the URLs of the websites you want to block and save the changes.
- Test Restrictions: After saving the changes, connect a restricted device or user during blocked hours or try accessing blocked websites. The restrictions should be in effect.
Parental control features provide a comprehensive way of restricting internet access for specific devices or users within your home network. They offer granular control over time restrictions and website blocking, allowing you to ensure a safe and controlled online environment for children or other users.
Method 4: Utilizing Guest Networks
Many routers offer guest network functionality, allowing you to create a separate network specifically for guests or devices that you want to restrict from accessing your primary network.
Here’s how you can set up and restrict specific devices from connecting to a guest network:
- Access Router Settings: Follow the steps mentioned earlier to access your router’s admin panel.
- Enable Guest Network: Once in the router settings, look for an option related to guest networks or guest access. Enable this feature.
- Configure Guest Network Settings: In the guest network settings, you should be able to specify a separate SSID (network name) and password for your guest network. Customize these settings according to your preferences and save the changes.
- Restrict Devices from Connecting: Some routers allow you to specify which devices are allowed or denied access to the guest network based on MAC addresses or other criteria. Look for options related to restricting devices from connecting and add the MAC addresses of devices you want to restrict from accessing the guest network.
- Test Restrictions: After saving the changes, try connecting restricted devices to both your primary network and guest network. Restricted devices should only have access to your primary network.
Utilizing guest networks provides an effective way of isolating devices from your primary network while still allowing them limited internet access. It ensures that guests or restricted devices do not have access to sensitive information or devices connected to your primary network.
Method 5: Third-party Applications and Software
In addition to built-in router features, there are also third-party applications and software available that offer advanced Wi-Fi control features beyond what is provided by default.
Here are some popular applications and their functionalities:
- Netcut: Netcut is a Windows application that allows you to scan and control Wi-Fi networks by cutting off internet access for selected devices.
- Fing: Fing is a mobile app available for both iOS and Android that provides detailed information about devices connected to your network and allows you to block or pause their internet access.
- OpenDNS: OpenDNS is a cloud-based DNS service that offers advanced content filtering and internet access controls through its parental control features.
- Circle Home Plus: Circle Home Plus is a hardware device that connects to your home network and provides comprehensive parental controls, including time restrictions, website blocking, and content filtering.
- Router Limits: Router Limits is another hardware solution that provides advanced parental controls with options for time restrictions, content filtering, and remote management of connected devices.
When using third-party applications or software, it’s important to research their compatibility with your specific router model and ensure they meet your requirements regarding functionality and security.
Frequently Asked Questions (FAQs)
Q1: Can these methods completely prevent someone from accessing my Wi-Fi network?
While these methods provide effective ways of restricting Wi-Fi access, determined individuals may still find ways around them, especially if they have physical access to your router or possess advanced technical knowledge. However, implementing these methods significantly enhances security and makes it more difficult for unauthorized users to connect to your Wi-Fi network.
Q2: Will these methods affect other devices connected to my Wi-Fi network?
No, these methods only restrict Wi-Fi access for specific devices or users without affecting other devices connected to your network.
Q3: How often should I review and update my restrictions?
It’s recommended to periodically review your restrictions and update them as needed. For example, if you have assigned static IP addresses or MAC addresses change due to hardware upgrades or replacements, you may need to update your configuration accordingly.
Q4: Can I use multiple methods simultaneously?
Yes, you can combine multiple methods discussed in this blog post for enhanced control over Wi-Fi access on your network. For example, you can use both MAC address filtering and parental control features together.
Q5: Are these methods reversible?
Yes, all methods discussed in this blog post can be reversed by accessing your router’s admin panel and disabling the respective settings or removing any restrictions imposed on specific devices or users.
Final Thoughts
Finally, by following the steps in this blog post, you will gain the ability to control and disable Wi-Fi access for specific devices on your network. Whether you want to restrict access for certain users or temporarily disable Wi-Fi for specific devices, these comprehensive methods provide effective solutions.
Remember that implementing these methods enhances security and allows for better management of bandwidth usage on your Wi-Fi network. However, it’s essential to regularly review and update your restrictions based on changing requirements and circumstances.
Take advantage of built-in router features such as MAC address filtering, IP address filtering, parental control functionalities, and guest networks. Additionally, consider exploring third-party applications and software that offer advanced Wi-Fi control features beyond what is provided by default.
By implementing these techniques, you can ensure a safe and controlled online environment while maintaining optimal performance and security on your Wi-Fi network.




Leave a Reply
You must be logged in to post a comment.