Bandwidth Merge or Load Balance with Failover is One of the most generally utilized applications of load balancing is to supply a single Internet service from double services, such as when we take from two ISP internet line 4Mbps+4Mbps=8Mbps than it will be equal 8Mbps.
If we do two ISP line merge than we will get double Bandwidth. On the other hand, when one connection will be down then another connection automatically will run. It is generally mixed with Failover and backup services are occasionally known as a server farm and Local area Network.
Generally, load-balanced systems include common web sites, heavy Internet Relay gossip networks, high-bandwidth File Transfer communications protocol sites.in a single word, it is called redundant communications Links. Let’s go and start following below step by step Load balancing on MikroTik.
Step 1: At first put IP/subnet mask=192.168.0.1/24, G.W:192.168.0.1 Ether=3>Apply>ok (ISP 1)
second put IP/Subnet mask=10.10.0.1/24, G.W: 10.10.0.1 Ether=4 >Apply>ok (ISP 2)
winbox>IP>Firewall>Mangle+General>Chain=Prerouting,>Dst.Address=192.168.0.0/24
Step2:IP>Firewall>Mangle+ Action=accept > Apply >OK
Step3:IP>Firewall>Mangle+General>Chain=Prerouting,Dst.Address=10.10.0.0/24, Action=accept >Apply>OK (ISP2)
Step 4: IP>Firewall> Mangle+General >Chain=input> In. Interface=ether3>Apply>OK
Step 5:IP>Firewall + Mangle + Action=Mark connection > New connection Mark=ISP1 >Apply>ok
Step 6: IP>Firewall> Mangle+General >Chain=input> In. Interface=ether4>Apply>OK
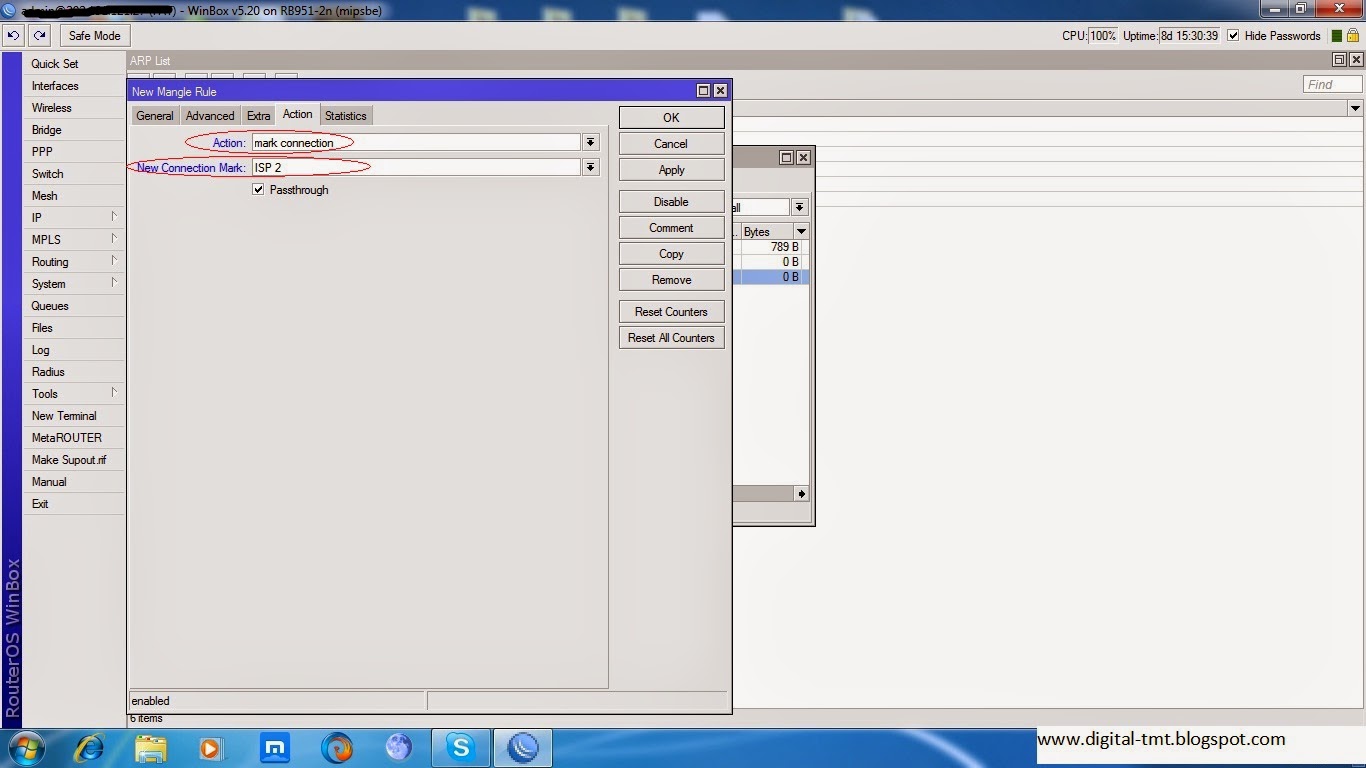
Step 7: IP>Firewall>Mangle+ Action=mark connection>New Connection Mark=ISP2>OK
Step 8: IP>Firewall + Mangle > General>Chain=output>connection Mark=ISP1>Apply>OK
Step 9: IP>Firewall + Mangle > Action=mark routing>New Routing Mark=ISP1>Apply>OK
Step 10:IP>Firewall + Mangle >General>Chain=output>connection Mark=ISP2>Apply>OK
Step11:
IP>Firewall + Mangle > Action=mark routing>New Routing Mark=ISP2>Apply>OK
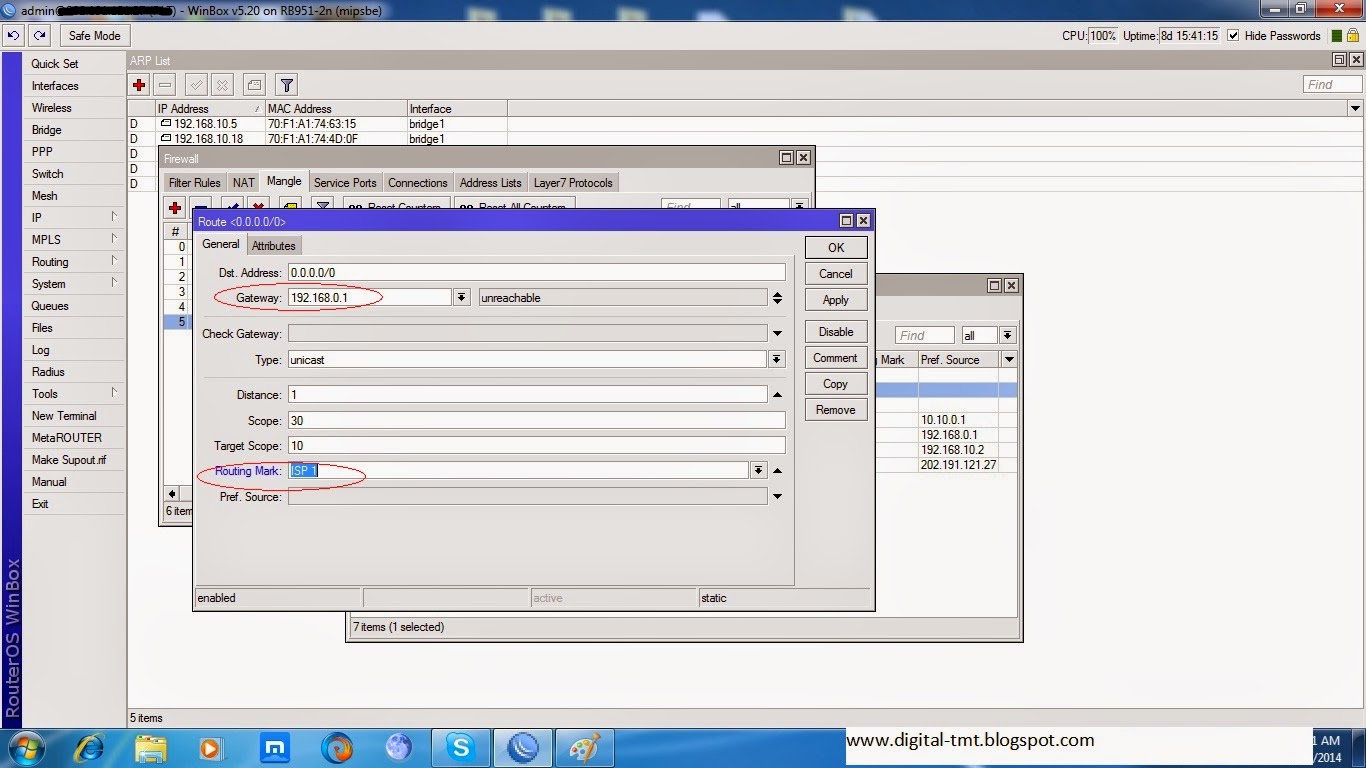
Step12: IP>Routes+General>Getway=192.168.0.1> Routing Mark=ISP1>Apply>OK
Step 12: IP>Routes +General> Getway=192.168.0.1 > Routing Mark=ISP2>Apply>OK
Step13: when I will complete all step then we will check load balance. I will create the LAN site. IP>address + address=172.16.0.1/24 >Interface=ether5
At last, I will put the LAN site IP on PC or Laptop then we can check load balance and Failover
You can see the Video Tutorial









Leave a Reply
You must be logged in to post a comment.