In this digital age where cyber threats lurk around every virtual corner, safeguarding your network infrastructure has become crucial. One effective measure to protect your system from unauthorized access and malicious activities is by configuring a robust firewall. MikroTik Router, known for its powerful networking solutions, offers a comprehensive range of firewall features that can fortify your network’s defenses.
In this article, we will delve into the intricacies of firewall configuration on MikroTik Router, exploring the essential steps and techniques needed to create a secure environment for your data and devices.
Whether you are an IT professional or an avid enthusiast seeking to enhance your network security knowledge, Come and discover the hidden knowledge of constructing an invincible stronghold using MikroTik’s powerful firewall features.
Firewall: A firewall is a network security process that controls the outgoing and incoming network traffic, which is controlled by Mikrotik Router. Today we will learn how to block website and website filtering. we can block a specific website in our network. Today we will show how Facebook and YouTube will be denied in our network.
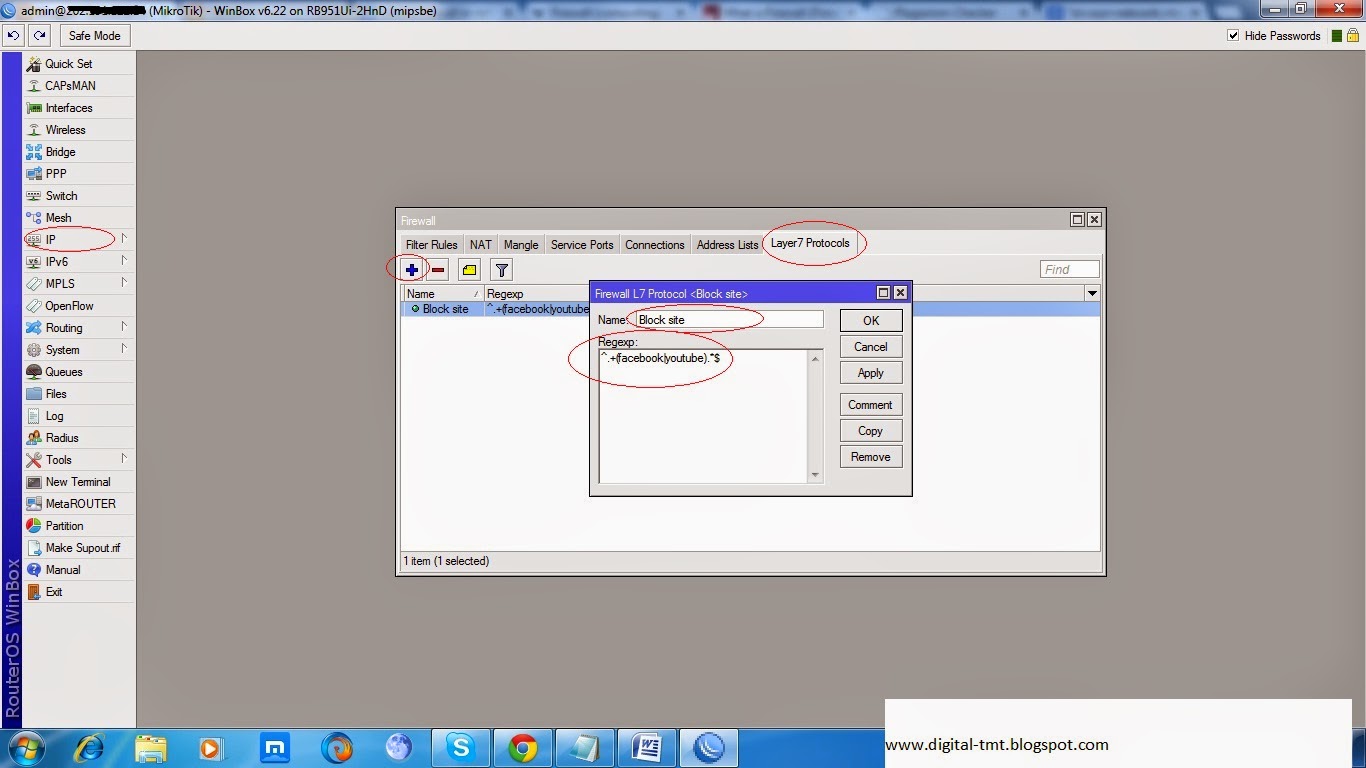
Step 1: IP > Firewall > Layer 7 protocols + Name=Block site > Regexp ^.+(facebook|youtube).*$ Apply>OK
Step 2: IP > Firewall > Filter Rules + General > Chain=Forward > Src. Address=172.16.0.100 Apply> OK

Step 3: IP > Firewall > Filter Rules + Advance > 7 Layer protocol= select Block site > Apply > OK

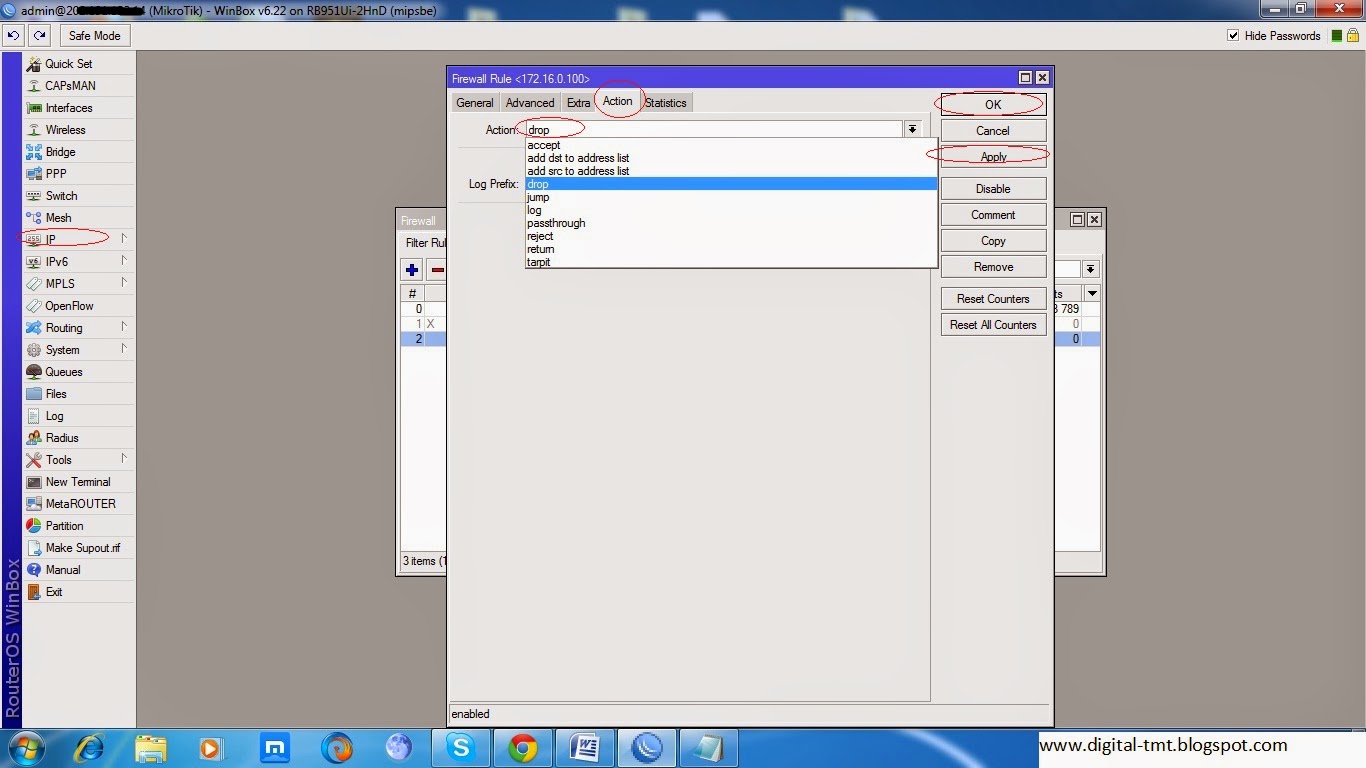
Step 4: IP > Firewall > Filter Rules > Action > drop > Apply > OK
Now everything is completely set up. Now you can set your Laptop IP 172.16.0.100 and browse Facebook and YouTube.
When you browse Facebook and YouTube then it will show access denied.
Firewall configuration for individual IP:
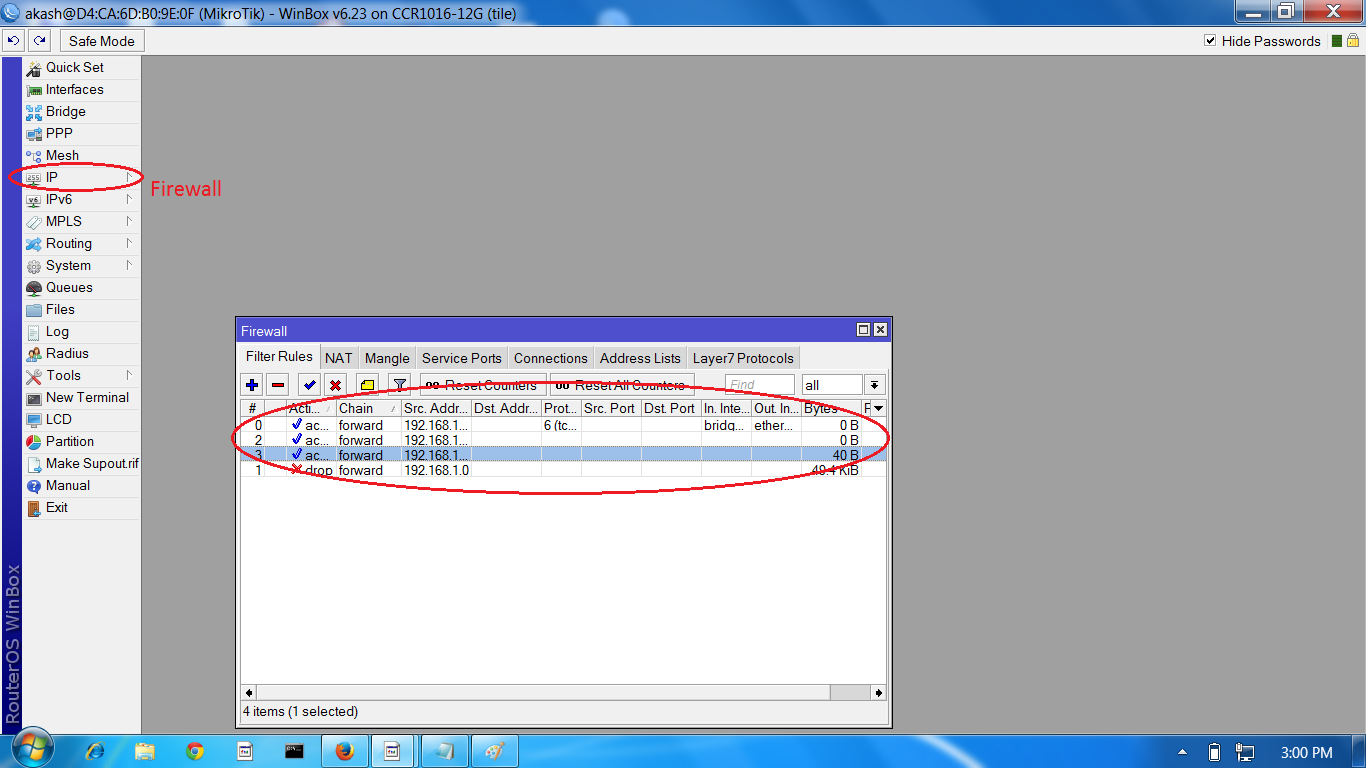
How to individual IP will be allowed: if you want to create individual IP address will get browse every site then you can create below this rule
Step1: IP > Firewall > Filter Rules + General > Chain=Forward > Src Address=192.168.1.98 > Apply > OK
step2: IP > Firewall >Action =Accept > Apply >OK
step3: IP >Firewall >Filter Rules > click and drag on accept Rule( must be above accept rule)
You can see the video tutorial for better understanding






Leave a Reply
You must be logged in to post a comment.