To use a wi-fi router as a repeater, access the router’s settings and enable the repeater mode. After that, choose the wi-fi network you want to extend and enter its details.
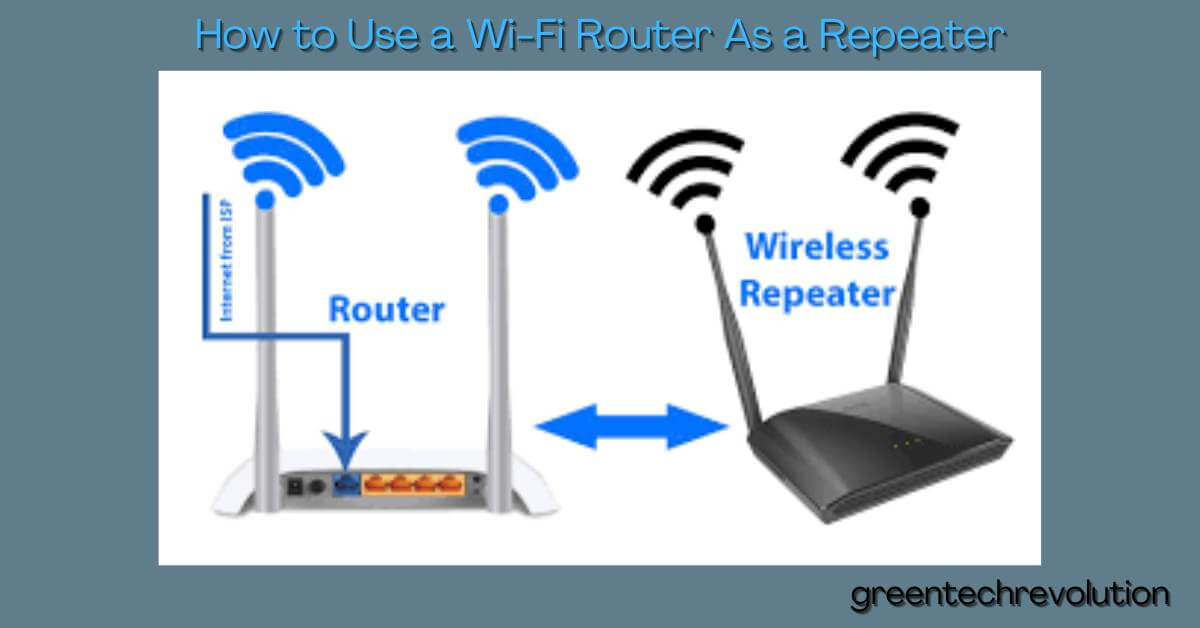
Having a reliable wi-fi connection at home or your workplace is essential nowadays. However, it’s not always possible to reach every corner of a large space with your router’s range. Luckily, there is a solution to this problem. By using your wi-fi router as a repeater, you can extend your wi-fi signal without the need for additional hardware.
This method is not complicated, and you can easily set up the repeater mode from the router’s settings. In this article, we will guide you through the steps needed to use your wi-fi router as a repeater.

Checking Router Compatibility
Are you struggling with weak wi-fi signals in some parts of your house or office? If so, you can use a wi-fi router as a repeater to extend your network’s coverage without buying an additional router. Before jumping into it, you should check if your router is compatible with the repeater mode.
In this blog post, we will walk you through the process of checking router compatibility, identifying supported router models and firmware versions, and checking existing router settings.
Understanding Router Compatibility With Repeater Mode
Before we begin, let’s take a look at router compatibility with the repeater mode. Not all routers are compatible with this mode, and not all routers that are compatible with this mode are the same. For example, some routers only support the repeater mode when they are connected to a specific router model.
To check if your router is compatible with repeater mode, you should go through the router manual. Look for the repeater mode in the documentation, or search for the repeater mode on the router’s manufacturer’s website. If it is not available in the manual, it may not be compatible with the repeater mode.
Identifying Supported Router Models And Firmware Versions
If your router is compatible with repeater mode, you should ensure that your router model and firmware version is supported. Check your router manufacturer’s website to see if your router is supported. The firmware version must also be supported, as some versions may not support the repeater mode.
We recommend checking the manufacturer’s website for a list of supported router models and firmware versions. If your router model or firmware version is not on that list, then it may not be compatible with the repeater mode or may not be compatible with your network setup.
Checking Existing Router Settings
Before setting up your router as a repeater, you should check your existing router settings. Your existing router settings could affect the performance of your repeater.
Firstly, check if your router has a “Guest Network” enabled, as it can interfere with the repeater settings. Secondly, ensure that your router’s wireless security setting is set to WPA2-PSK, as an incompatible security setting can cause connection problems. Thirdly, check the router’s DHCP pool.
Ensure that it has enough ip addresses to support the additional devices connecting to the repeater’s network.
It is essential to check if your router is compatible with the repeater mode and that your router model and firmware version are supported. Once you have ensured that your router is compatible and the existing router settings are correct, you can move on to setting up your router as a repeater.
By following these guidelines, you can extend your wi-fi network coverage and eliminate any potential dead zones.
Configuring Router As A Repeater
If you have a Wi-Fi router, there’s an excellent chance that you can use it as a repeater. Repeating is a useful method of extending a wireless network without the expense of adding more routers. In this guide, we will discuss how you can configure a router as a repeater, including setting up DHCP and applying changes.
Let’s get into it!
Accessing The Router’S Web-Based Setup Page
The first step in setting up your router as a repeater is to access the router’s web-based setup page. To do this, you will need the router’s ip address, which you can typically find in your router’s user manual. Follow these simple steps to access the setup page.
- Open a web browser on a computer or mobile device that is connected to the same network as your router.
- Type the router’s ip address in the web browser’s address bar, then press enter.
- Enter the router’s username and password.
- Once you’re logged in to the router’s web interface, navigate to the repeater settings.
Enabling Repeater Mode And Configuring Settings
The next step is to enable repeater mode and configure the settings. Here’s how to do it.
- Find the wireless repeater setting on the router’s web-based setup page.
- Enable the repeater mode by selecting the option.
- Type in the name of the network that you wish to extend. (note: You will also have to enter the password for the network you are extending).
- Select the wireless channel used by the wireless router that is broadcasting the network you are extending.
Setting Up DHCP Configuration
After you have configured the basic settings, it’s time to set up dhcp. Dhcp configuration can be done in only a few steps.
- Select the dhcp settings from the router’s configuration page.
- Enable dhcp settings.
- Assign a fixed ip address to the router (repeater). This address must be outside of the dhcp range set by the wireless router.
- Set the default gateway to the ip address of the wireless router that you are extending.
Applying The Settings And Restarting The Router
Finally, once you have configured all of the settings for your repeater, you will need to apply and restart the router to save the changes. Here’s how to do that.
- Navigate to the wireless repeater settings page.
- Click “apply” to save the changes.
- Restart the router and wait for a few minutes to ensure the settings have been successfully applied.
And there you have it – you have now configured your router as a repeater. Your router will now extend the range of your wireless network, allowing you to connect to the internet from further away. With the right settings in place, you can easily enjoy a better, more reliable internet connection in every corner of your home!
Connecting Router To Network
Are you having trouble getting a decent wi-fi signal in every corner of your house? Worry no more! With a wi-fi router used as a repeater, you can extend your wireless coverage throughout your entire space. I will guide you through the process of connecting the router to your network.
Read on to learn more.
Reviewing The Network Topology And Layout
Before you connect your router to your network, it’s essential to have a clear understanding of your network topology and layout.
- Identify the location of your modem. Your modem is the device that connects to your internet service provider (isp) and provides access to the internet.
- Check if you have an existing wireless router and the location where it is installed.
- Take a good look at the areas in your house where the wireless signal is weak or unavailable.
Determining The Optimal Placement For The Repeater
Before establishing a connection between your router and the network, the next step is determining the optimal placement for the repeater.
- Locate an area near the weak coverage area and connect the repeater.
- Ensure that there is a power outlet near this location.
- Try to keep the repeater at a reasonable distance from the router. This way, there will be enough signal distortion to amplify without causing interference.
Establishing A Connection Between The Router And The Network
After reviewing your network topology and determining the optimal placement for the repeater, it’s time to establish a connection between the router and the network.
- First, plug in the repeater to a power outlet and wait for the power light to turn green.
- Connect your laptop or computer to the repeater using an ethernet cable.
- In your web browser, enter the ip address of the router to access its setup page.
- Navigate to the wireless settings section and configure the repeater to connect to your existing network.
- Once you have entered the necessary details, save the settings and wait for the repeater to reboot.
Verifying Connection And Troubleshooting Issues
The final step is verifying your connection and troubleshooting any issues.
- No signal from the repeater: First, ensure that the repeater is connected to a power source. Then, try resetting it and checking the network settings again.
- Weak signal: Adjust the placement of the repeater until you get better coverage.
- Unable to connect to the internet: Check your modem and other devices to ensure they are working correctly.
Setting up a wi-fi router as a repeater can be an effective way to improve the wireless coverage in your home or office. By following the steps outlined you will be able to connect your router to your network and enjoy a stronger and more reliable wireless signal.
Configuring Wi-Fi Settings
Using a wi-fi router as a repeater can increase the range of your wi-fi network, allowing you to enjoy better coverage in all areas of your home or office.
Setting Up The Extended Wi-Fi Network Name (SSID)
This is the name of the network that devices will connect to, so you need to choose a name that is easy to identify and remember.
- Type in the ssid of your main network that you want to repeat.
- Choose your preferred extended wi-fi network name (SSID) and type it in.
- Make sure that the ssid is different from the main network’s ssid, but easy to recognize.
Configuring Wireless Security Settings
Security should be your top priority when setting up your repeater network, so you need to configure the right wireless security settings.
- Choose the wireless security mode that you are using on the main wi-fi network.
- Type in the security key or password.
- Apply these settings for the extended wi-fi network as well.
Choosing An Optimal Channel For The Wi-Fi Network
Selecting the right channel is crucial in ensuring smooth and uninterrupted network coverage.
- Go to the wi-fi settings of your router.
- Check for the channel that has the least interference from other wi-fi networks.
- Save and apply the chosen channel.
Testing The Wi-Fi Signal Strength
After configuring the extended wi-fi network name, wireless security settings, and choosing the right channel, it’s important to test the wi-fi signal strength to ensure that you’re getting the best possible coverage.
- Check the signal strength in all areas where you need wi-fi access.
- Make sure that the signal strength is strong in all areas.
- If the signal strength is weak in some areas, move the repeater device closer to the main router.
Following these steps will allow you to configure your wi-fi settings and use your wi-fi router as a repeater to extend your network coverage.
Configuring LAN Settings
Wi-fi router is becoming more essential to our daily lives as we are becoming more dependent on the internet. Sometimes, we face issues with the signal strength of the router, and it is frustrating when we can’t access the internet.
To resolve this problem, one of the best solutions is to use a wi-fi router as a repeater. In this blog post, we will explain how to use a wi-fi router as a repeater, specifically focusing on configuring the lan settings.
Setting Up LAN Settings On The Repeater
When setting up a router as a repeater, the first thing you need to do is configure the lan settings on the router. Configuring the lan settings is important for the router to function as a repeater.
- Connect the router to a computer using an ethernet cable
- Access the router’s web-based setup page by entering the ip address of the router in the browser
- Navigate to the lan settings page on the web-based setup page
- Change the ip address of the repeater router so that it is unique from the main router’s ip address
- Configure the dhcp settings to disable the dhcp server on the repeater router
- Ensure that the repeater router has a different subnet mask from the main router, e. G. , if the main router has a subnet mask of 255. 255. 255. 0, then set the subnet mask of the repeater router as 255. 255. 255.
Configuring Ipv4 Or Ipv6 Address Spacing
The next step after configuring the lan settings is to configure the ipv4 or ipv6 address spacing.
- Choose the ip addressing mode that is compatible with the main router, i. E.
- Select the same ip addressing mode for the repeater router as the main router
- Set the ip address of the repeater router as the default gateway for the devices connected to the repeater router
Configuring DNS Settings
The final step in configuring the router as a repeater is to set the dns settings. The dns settings ensure that the repeater router can resolve domain names to ip addresses.
- Navigate to the dns settings page on the web-based setup page
- Choose either the automatic or manual dns option
- If you select the manual dns option, enter the ip address of the dns server provided by your isp
- Save the changes made to the dns settings
Using a wi-fi router as a repeater can help to extend the signal coverage of the router. When setting up the repeater router, configuring the lan settings is fundamental. The process involves setting up the ip address, dhcp settings, and subnet mask.
Additionally, configuring the ipv4 or ipv6 address spacing and dns settings ensure that the repeater router works in tandem with the main router to deliver consistent internet access.
Configuring WAN Settings
Setting Up WAN Settings On The Repeater
Before configuring the wan settings, make sure that your router has a working internet connection.
- Connect your computer to the repeater’s network.
- Log in to the repeater’s web interface by typing the router’s ip address into the web browser.
- Navigate through the router’s web interface and click on ‘WAN settings’.
- Select wan connection type and configure the settings for that connection.
- Click on the ‘apply’ button to save your settings.
Configuring The Network Address And Subnet Mask
The network address and subnet mask are essential components of the wan settings. These settings provide information about the connected network’s ip address and the range of ip addresses available for devices to use.
- Navigate to the ‘network’ settings in the web interface.
- Look for the option to specify the network address and subnet mask.
- Input the network address and subnet mask manually.
- Double-check your entries to make sure that they are correct.
- Click on the ‘apply’ button to save your settings.
Configuring Dns Settings
The domain name system (DNS) is responsible for resolving domain names to ip addresses. Configuring DNS settings on your repeater is important to ensure that your devices can access the internet.
- Navigate to the ‘dns’ settings in the web interface.
- Enter the ip address of your dns server in the appropriate field.
- Some routers may allow you to specify more than one dns server. If this is the case, be sure to list them all.
- Click on the ‘apply’ button to save your settings.
Configuring wan settings is an essential step in setting up a wireless repeater. By following these instructions, you should be up and running in no time. Remember to keep your settings consistent with your existing network to avoid any complications.
Configuring Parent Router Settings
Configuring Wi-Fi network settings on parent router:
To configure wi-fi network settings on the parent router for the repeater, follow these steps:
- Access the router’s settings by typing the ip address in your web browser.
- Go to the wireless settings tab.
- Change the wireless mode to repeater.
- Set the ssid name as the same on both routers.
- Set the security and encryption methods as the same on both routers.
- Make sure that the channel width, channel number, and channel frequency match the main router.
Configuring LAN and WAN settings on main router:
To configure LAN and WAN settings on the main router for the repeater, follow these steps:
- Access the router’s settings by typing the ip address in your web browser.
- Go to the dhcp settings tab.
- Set dhcp server range on your main router.
- Configure the repeater’s ip address on your main router’s wan settings.
Configuring dynamic routing protocols between the two routers:
To configure routing protocols between the two routers, follow these steps:
- Access the router’s settings by typing the ip address in your web browser.
- Go to the routing settings tab.
- Enable dynamic routing protocols and select rip.
- Configure routing metrics on both routers.
- Make sure to enable the rip protocol on the repeater as well.
By following these configurations, you can now use your wi-fi router as a repeater to extend your wi-fi signal.
Configuring QoS Settings
Understanding QoS (Quality Of Service) And Its Importance
Before we dive into configuring QoS settings, let’s first understand what QoS is and why it’s important. Qos stands for quality of service, and it is a protocol that prioritizes and manages network traffic. Qos is important because it improves the overall quality of your network by ensuring that important traffic, such as video calling or online gaming, receives the proper amount of bandwidth.
By prioritizing network traffic, qos can prevent network congestion and ensure a seamless online experience.
Configuring Qos Settings On The Repeater
When using your wi-fi router as a repeater, it’s essential to configure qos settings on the repeater itself.
- Log in to the repeater’s web interface by entering the ip address in your browser.
- Navigate to the qos settings section.
- Enable qos.
- Choose the type of qos that you need. Most routers have two types of qos: Application-based and device-based. If you are experiencing problems with one specific application, application-based qos should be your choice. For improving overall network performance, device-based qos is more effective.
- Set the priority of your preferred devices. You can do this based on the device’s mac address or ip address. By doing this, you are telling the router to treat this device’s traffic with priority, ensuring that it gets the bandwidth it needs.
Configuring Qos Settings On The Main Router
Configuring qos settings on your main router is essential.
- Log in to your router’s web interface.
- Navigate to the qos settings section.
- Enable qos.
- Choose the type of qos that you need: Application-based or device-based.
- Set the priority of your preferred devices. Most routers allow you to do this based on the device’s mac or ip address.
- Set your maximum and minimum bandwidth limits. This will ensure that each device on your network gets the amount of bandwidth it needs.
By following the above steps, you can improve your overall network performance, ensuring that important applications and devices receive the necessary bandwidth. Remember to do this for both the repeater and the main router to ensure an effective and efficient network ecosystem.
Testing The Repeater
If you’re trying to extend your wi-fi signal range in your home or office, using a wi-fi router as a repeater can be an effective solution. However, you’ll want to make sure that it’s working as expected. In this section, we’ll look at assessing whether your wi-fi repeater is doing its job.
Evaluating The Signal Strength And Range Of The Extended Wi-Fi Network
Once you have set up your wi-fi repeater, it’s time to assess the signal strength and range of the extended wi-fi network. You can do this using either a smartphone app or a computer software that can measure wi-fi signal strength.
The following steps can help you evaluate the signal strength and range of the extended wi-fi network:
- Move around your home or office with your measuring device and check the signal strength and quality in each room or location.
- Record the signal strength readings in different locations and at different distances from the router.
- Ensure that the signal strength is at least -70 dbm (-60 dbm is ideal) for the areas where you’ll be using the wi-fi network.
- Take note of any areas with a weak or dead signal.
Analyzing Latency And Throughput
When it comes to analyzing latency and throughput, you can use a program like iperf to measure the speed and quality of your wi-fi connection, including your wi-fi repeater.
Before proceeding with latency and throughput testing, ensure that all wi-fi networks (including any nearby ones) are not being used. You should also be in close proximity to the router or repeater.
The following steps can help you analyze latency and throughput:
- Identify the ip address of the router or wi-fi repeater.
- Open the terminal app on your computer or smartphone.
- Enter the command “iperf -c [router ip address]” and hit enter.
- The test will run automatically, giving you throughput and latency readings.
- You can repeat the test in different locations and at different intervals to see how latency and throughput fluctuate.
Identifying Any Areas With A Weak Or Dead Signal
Once you have completed your evaluation and analysis, you’ll want to identify any areas where you still have a weak or dead signal. This may include rooms or areas farthest away from your wi-fi repeater, or areas with obstructions such as walls or furniture.
The following steps can help you identify any areas with a weak or dead signal:
- Take note of any areas where the signal strength is weak or non-existent.
- Consider using wi-fi extenders or mesh networks to improve signal strength and range in those areas.
- Try relocating your wi-fi repeater to a more central location to improve overall signal coverage.
By following these steps, you can ensure that your wi-fi repeater is working as expected, providing you with the signal strength and coverage that you need.
Troubleshooting Common Issues
Are you struggling to expand your wi-fi coverage range? Well, brace yourself because, we will show you how to use a wi-fi router as a repeater. However, after setting up, you might face some common issues that we will address in detail.
You can fix them with the help of the step-by-step guide we provide below.
Issues With Configuring The Repeater Mode
Configuring the repeater mode might be a hazy concept at first, especially if you are new to networking.
- You may face trouble signing in to your router. Double-check the login credentials then try again.
- Configuring the router to operate inaccessibility mode might be tough. In the parent router, find the access point or bridge mode selection menu; it’s usually under “advanced” settings.
- The WiFi name must be the same throughout both parent and repeater router configurations.
- And make sure DHCP is turned off for the repeater.
Issues With The Repeater’S Connection To The Parent Router
Congratulations, your repeater configuration is now up and running! However, you might face some issues with the repeater-to-parent router connection.
- First, make sure you have placed both the parent and repeater router within each other’s operating ranges.
- Check if your parent router does not have the mac filter turned on. If so, implement the appropriate steps to add the repeater’s mac address to the list.
- Confirm that the password you used to connect the repeater to the parent network was correct.
- Restart both routers to allow them to establish a fresh connection.
- If there is still no connection, review your repeater configuration prompts, looking for anything suspicious.
Issues With Wi-Fi Signal Strength And Throughput
Issues with wifi signal strength or throughput while using a wi-fi router as a repeater are quite common.
- If the wi-fi signal appears to be strong but the speed is slow, interference could be causing the issue. Ensure that you place the repeater far from any devices that may generate electromagnetic interference like cordless phones or microwaves that might interfere with your connection.
- Distance is another common issue. The farther the router is located from the repeater, the weaker the signal strength may be. Try using stronger antennas that can extend the range of the repeater signals.
- Ensure firmware is updated for consistent and stable wi-fi throughput. The best practices recommend checking for firmware updates every six months.
Issues With Missed Firmware Updates Or Outdated Router Settings
Lack of updating firmware or outdated router settings can cause errors.
- Make it a habit to update your router firmware occasionally.
- Ensure your router configuration settings are up to date, including network passwords, mac filters, and firewalls.
- Reset your router to its factory settings to erase any customizations that might cause connectivity issues.
Remember, troubleshooting any issue requires attentiveness and patience. These tips and tricks will help reduce issues with your wi-fi router as a repeater.
Best Practices
Importance Of Keeping Router Firmware Up-To-Date
Keeping your router’s firmware updated is crucial to ensure that it continues to function optimally. Firmware is the programming embedded within the device that runs the hardware. Most routers are developed with bugs and glitches that can cause issues with network performance, compatibility, and security.
Regular firmware updates help fix these bugs and glitches, improve performance, and secure the network from vulnerabilities.
Here are some benefits of keeping router firmware up-to-date:
- Improved security: Outdated firmware can leave your network vulnerable to cyberattacks. Manufacturers typically address security issues through firmware updates, and failing to update your firmware can leave your network exposed to unauthorized access.
- Improved performance: Firmware updates can improve the performance of your router by fixing bugs and glitches that might hamper its smooth functioning. They can also add new features to the router to enhance its performance.
- Better compatibility: Your router’s compatibility with other electronic devices can be affected by outdated firmware. New firmware updates can help the router work more seamlessly with the latest devices.
Tips For Maintaining Optimal Signal Strength And Throughput
Your wi-fi network should be reliable and deliver the intended speed. Your router’s signal strength and throughput are essential factors contributing to wi-fi network quality.
- Location: Keep the router in a central location away from walls, appliances, and other electronic devices that can weaken the signal strength.
- Antennas: Adjust the router antennas for the best signal. Change their position and rotation until you find the best orientation for optimal signal strength and throughput.
- Avoid interference: Other wi-fi networks, bluetooth devices, baby monitors, and microwave ovens can interfere with your wi-fi signal. Therefore, place the router away from these devices.
- Frequency: Switching between the 5ghz and 2. 4ghz frequencies can help improve signal strength and throughput. The 5ghz frequency has better throughput, but its range is limited while the 2. 4ghz frequency has lower throughput but a broader range.
- Secure network: Ensure your wi-fi network has a strong password to prevent unauthorized use by neighbors and hackers.
Strategies For Reducing Interference On The Wi-Fi Network
Interference can cause low signal strength, bad throughput, and ultimately result in slow wi-fi speeds.
- Change the wi-fi channel: Switching to a different channel can minimize interference. Generally, wi-fi channels 1, 6, and 11 are recommended as they do not overlap.
- Update drivers: Old drivers on your electronic devices can cause interference in your wi-fi network. Ensure that all your devices have the latest drivers installed.
- Position of router: Move the router away from walls, floors, and ceilings. Ensure there is adequate ventilation around your router for optimal performance.
- Upgrade to a newer router: Older routers often have a weaker signal and lower throughput. Consider upgrading to a newer router to improve your wi-fi network’s performance.
By following these best practices for using your router as a repeater, you can improve the signal strength, throughput, and quality of your wi-fi network for a better online experience.

Frequently Asked Questions For How To Use A Wi-Fi Router As A Repeater
What Does A Wi-Fi Router Repeater Do?
A wi-fi router repeater extends the coverage area of your wi-fi network by repeating signals.
How Can I Tell If My Router Is A Repeater?
If your router has a wds option in its settings, it can serve as a repeater.
How Do I Set Up A Router As A Repeater?
Connect your router to a computer, log in to its settings, and enable the wireless repeating function.
What Is The Difference Between A Repeater And An Extender?
There is no difference. The terms repeater and extender are often used interchangeably.
Can All Routers Be Used As Repeaters?
Not all routers can serve as repeaters. Check if your router has a wds option in its settings.
How Far Can A Repeater Extend Wi-Fi?
A repeater can extend wi-fi from 30 to 50 feet with one obstacle in the way.
How Many Routers Can Be Used As Repeaters?
You can use multiple routers as repeaters, but make sure they’re all connected through ethernet cables.
Can A Repeater Increase Internet Speed?
A repeater may reduce internet speed because it divides bandwidth between the router and devices.
What Is The Ideal Placement For A Repeater?
Put the repeater halfway between the router and area with weak signal to receive and repeat signals.
How Do I Troubleshoot Repeater Connection Issues?
Ensure the repeater is receiving a strong signal and is not too far away from the router. Try resetting it.
Final Thoughts
Using a wi-fi router as a repeater can be a great solution for extending your wi-fi network coverage and eliminating dead spots. It’s an easy process that only requires a few simple steps, especially if you follow the guidelines carefully.
The first step is to ensure that both routers are compatible, and then connect them either wirelessly or using an ethernet cable. Setting the SSID and security settings should be done next to avoid any potential conflicts. Testing the connection and adjusting the antennas are the final steps to ensure optimal signal strength.
It’s important to keep in mind that using a wi-fi router as a repeater can slightly reduce the overall network speed, but the tradeoff for improved coverage is well worth it. So go ahead and use the wi-fi router as a repeater to enhance your internet experience!


Leave a Reply
You must be logged in to post a comment.