Having a fast and reliable Wi-Fi network at home is an essential part of our daily lives. However, if you live in a house or apartment with an outdoor balcony, it can be difficult to get the necessary signal strength to your router. This article will provide you with a step-by-step guide on how to set up a Wi-Fi router for your balcony, so you can enjoy all the benefits of an efficient Wifi connection without having to worry about signal strength.
How to set up a Wi-Fi router for a balcony: To set up a Wi-Fi router for a balcony, follow these steps:
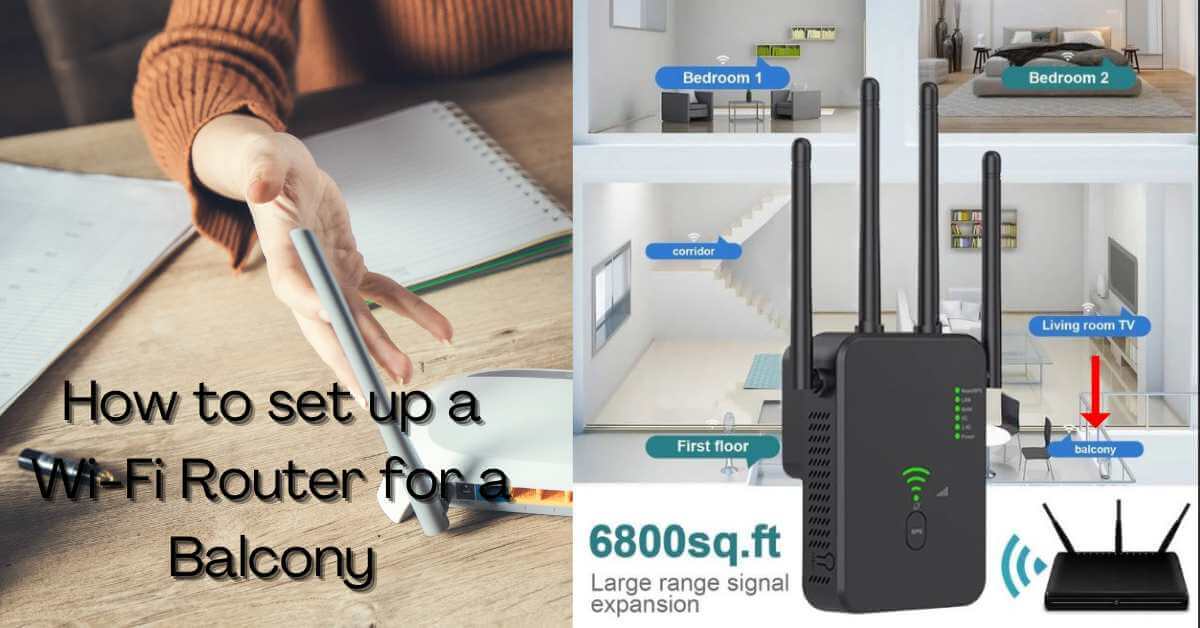
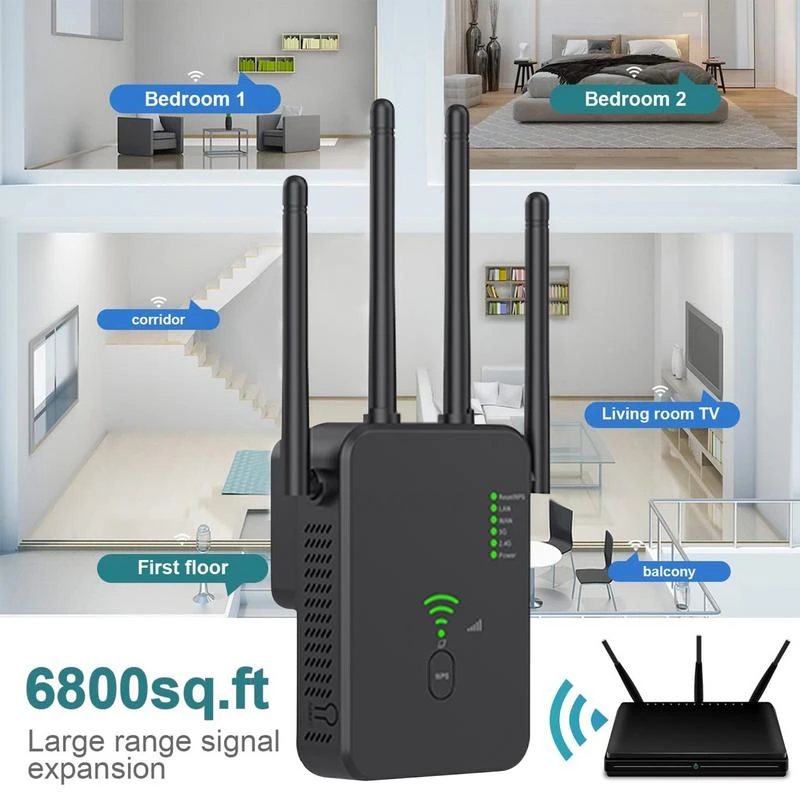
- Choose a router that has a coverage range that will reach your balcony.
- Connect the router to your modem using an Ethernet cable.
- Log in to the router’s settings page by entering the default IP address (usually 192.168.1.1) into your browser’s address bar.
- Set up a new wireless network with a unique name and password.
- Adjust the router’s antennas to maximize the signal strength in the direction of your balcony.
- Test the signal strength on your balcony using a Wi-Fi-enabled device.
With these simple steps, you can enjoy seamless Wi-Fi coverage on your balcony.

How to Set Up a Wi-Fi Router for a Balcony
Setting up a Wi-Fi router for your balcony can be a great way to enjoy the outdoors while still being connected to the internet. Whether you want to work outside, stream music, or just browse the web, having a strong Wi-Fi signal on your balcony is essential. In this article, we will guide you through the process of setting up a Wi-Fi router for your balcony, step-by-step.
Step 1: Choose the Right Router
The first step in setting up a Wi-Fi router for your balcony is to choose the right router. Look for a router that is designed for outdoor use, with a strong signal range and weather-resistant features. You should also consider the size of your balcony and the number of devices you want to connect to the network.
Once you have chosen your router, follow the manufacturer’s instructions for installation. This will typically involve connecting the router to your modem and configuring the network settings.
Step 2: Position the Router
The position of your router is crucial to ensuring a strong and reliable Wi-Fi signal. For balcony use, it is best to position the router as close to the balcony as possible. This may require running an ethernet cable from your modem to the router if it is not located nearby.
You should also consider the height at which the router is positioned. A higher position will generally provide better coverage, but may also be more susceptible to interference from other wireless networks or electronic devices.
Step 3: Configure the Network Settings
Once your router is installed and positioned, you will need to configure the network settings to ensure a secure and reliable connection. This will typically involve setting up a unique network name and password, as well as enabling any security features offered by the router.
It is also important to ensure that the network settings are optimized for outdoor use. This may involve adjusting the channel and frequency settings to minimize interference from other wireless networks, as well as enabling features like beamforming and MU-MIMO to improve signal strength and stability.
Step 4: Test the Connection
After configuring the network settings, it is important to test the connection to ensure that it is working properly. You can do this by connecting a device to the network and testing the internet speed and reliability.
If you experience any issues with the connection, you may need to adjust the router’s settings or reposition the router to improve signal strength.
Step 5: Enjoy Your Balcony Wi-Fi
Once you have successfully set up your balcony Wi-Fi, you can now enjoy all the benefits of a strong and reliable internet connection outdoors. Whether you want to work, stream, or just relax, you can do so from the comfort of your balcony.
Frequently Asked Questions
Setting up a Wi-Fi router on a balcony can be a bit tricky, especially if you’re not familiar with networking. In this guide, we’ll answer some of the most common questions about setting up Wi-Fi on your balcony.
What equipment do I need to set up Wi-Fi on my balcony?
To set up Wi-Fi on your balcony, you’ll need a Wi-Fi router, an Ethernet cable, and a power outlet. If your balcony is far away from your home’s router, you may also need a Wi-Fi extender or repeater to boost the signal.
It’s important to choose a router that’s designed for outdoor use and has a strong signal. You’ll also want to make sure the router is compatible with your internet service provider (ISP) and supports the latest Wi-Fi standards.
How do I position my router on the balcony?
When positioning your router on the balcony, it’s important to keep it away from obstacles that can block the signal, such as walls, furniture, and plants. You’ll also want to avoid placing the router too close to other electronic devices that can interfere with the signal.
Try to position the router as high as possible to maximize the signal strength. If your balcony has a metal roof or walls, you may need to position the router near the edge of the balcony or use a Wi-Fi extender to avoid interference.
How do I connect my devices to the Wi-Fi network?
Once your Wi-Fi router is set up on the balcony, you can connect your devices to the network by selecting the Wi-Fi network name (SSID) and entering the password. If you have a large balcony or multiple floors, you may need to set up additional access points or repeaters to ensure a strong signal throughout the area.
You may also want to consider using a mesh Wi-Fi system that can automatically switch between access points to ensure the best signal strength and coverage.
How do I secure my Wi-Fi network on the balcony?
To secure your Wi-Fi network on the balcony, you should set a strong password and enable encryption. Most routers support WPA2 encryption, which is considered the most secure option. You may also want to enable a firewall to block unauthorized access to your network.
It’s also a good idea to change the default login credentials for your router to prevent unauthorized access to the router settings.
What should I do if I’m having trouble setting up Wi-Fi on my balcony?
If you’re having trouble setting up Wi-Fi on your balcony, you may need to troubleshoot the router or check the signal strength. Make sure the router is correctly configured and positioned for optimal signal strength. You may also need to update the router firmware or reset the router to its factory settings.
If you’re still having trouble, you may want to contact your ISP or a professional network technician for assistance. They can help diagnose the issue and recommend the best solution for your specific setup.
Finally, setting up a Wi-Fi router for your balcony is a great way to stay connected while enjoying the outdoors. By following the aforementioned steps, you can ensure that your router is set up correctly and securely, allowing you to enjoy fast and reliable internet connection on your balcony. Remember to choose the right location for your router, ensure that it is placed on a stable surface, and secure it with a strong password to prevent unauthorized access. With these tips in mind, you can create a seamless and enjoyable browsing experience on your balcony. In today’s world, internet connectivity is essential for both work and leisure. Whether you’re working from home, streaming your favorite shows, or simply browsing the web, having a reliable Wi-Fi connection is key. By setting up a Wi-Fi router on your balcony, you can enjoy the benefits of the outdoors while staying connected to the world around you. With a little bit of effort and careful planning, you can easily set up your Wi-Fi router and start enjoying the great outdoors without missing a beat.


Leave a Reply
You must be logged in to post a comment.