Imagine this: You’re in the middle of an important video call when suddenly your WiFi signal drops out. Frustrating, isn’t it? If you’re tired of experiencing these connectivity issues with your Netgear WiFi extender, then keep reading because we have the ultimate solution for you.
In this comprehensive guide on how to factory reset your device, we will take you through each step so that you can say goodbye to those pesky interruptions and enjoy uninterrupted browsing and streaming once again.
Why factory reset your Netgear WiFi extender?
Resetting your Netgear WiFi extender to its factory settings can be a useful troubleshooting step when you encounter issues with your device. It essentially wipes out all the personalized settings and configurations that you have made, reverting it back to its original state. This can help resolve problems such as slow or unstable connection, difficulty in connecting devices, or even forgotten passwords.
One key benefit of performing a factory reset is that it eliminates any potential conflicts or errors caused by incorrect configurations. Over time, as you make changes to your extender’s settings, there is a possibility that some of these modifications may not work optimally together or may result in unforeseen issues. By resetting the device and starting fresh, you give yourself the opportunity to set up your WiFi extender from scratch and ensure that everything is in proper order.
Moreover, performing a factory reset on your Netgear WiFi extender can also be beneficial when you are planning to sell or give away the device. Resetting it ensures that all personal data and login credentials are removed from the unit entirely, protecting your privacy and preventing unauthorized access. Whether for resolving technical difficulties or ensuring data security during device disposal, a factory reset goes a long way in optimizing your experience with Netgear WiFi extenders while maintaining privacy and security standards.
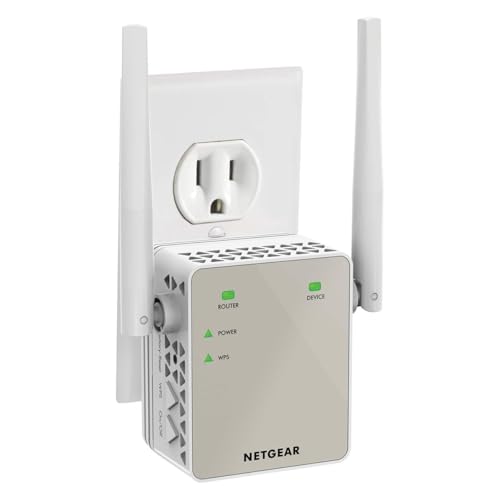
Before diving into the reset process, it’s crucial to make sure you’re well-prepared. Gather the necessary materials and tools, including a computer or mobile device, a paperclip or similar tool for pressing the reset button, and your Netgear WiFi extender.
Identify your extender’s model and version. This information is typically found on a label or sticker on the extender’s body. Different models may have slightly varying reset procedures, so knowing your extender’s specifics is essential.
Locate the reset button on your Netgear extender. It’s usually a small, recessed button that may require a pin or paperclip to access. Knowing the button’s location will save you time when it comes to the actual reset.
10 Tips: How to Factory Reset Netgear WiFi Extender Step by Step Guide

Step 1: Gather Materials Before you begin, make sure you have the following:
- Your Netgear WiFi extender.
- A small tool like a paperclip or pin.
- A computer or mobile device connected to your extender.
Step 2: Locate the Reset Button Find the reset button on your Netgear WiFi extender. It’s usually a small, recessed button. You may need to consult your extender’s manual or check the manufacturer’s website for the exact location since it can vary by model.
Step 3: Power On the Extender Plug in your Netgear WiFi extender and power it on. Wait for it to fully boot up, which may take a minute or two.
Step 4: Press and Hold the Reset Button Using the small tool you gathered earlier (paperclip or pin), press and hold the reset button. Hold it for about 10-30 seconds, or as specified in your extender’s manual. Continue to hold the button until you see the LED indicator lights on the extender respond.
Step 5: Observe the LED Lights While holding the reset button, keep a close eye on the LED indicator lights on the extender. During the reset process, these lights may flash or change colors. This is an indication that the factory reset is in progress.
Step 6: Release the Reset Button Once the LED lights stabilize or return to their default state, you can release the reset button. This signifies that the factory reset is complete.
Step 7: Wait for Reboot After releasing the reset button, your Netgear WiFi extender will reboot. This process can take a few minutes. Be patient and let it finish.
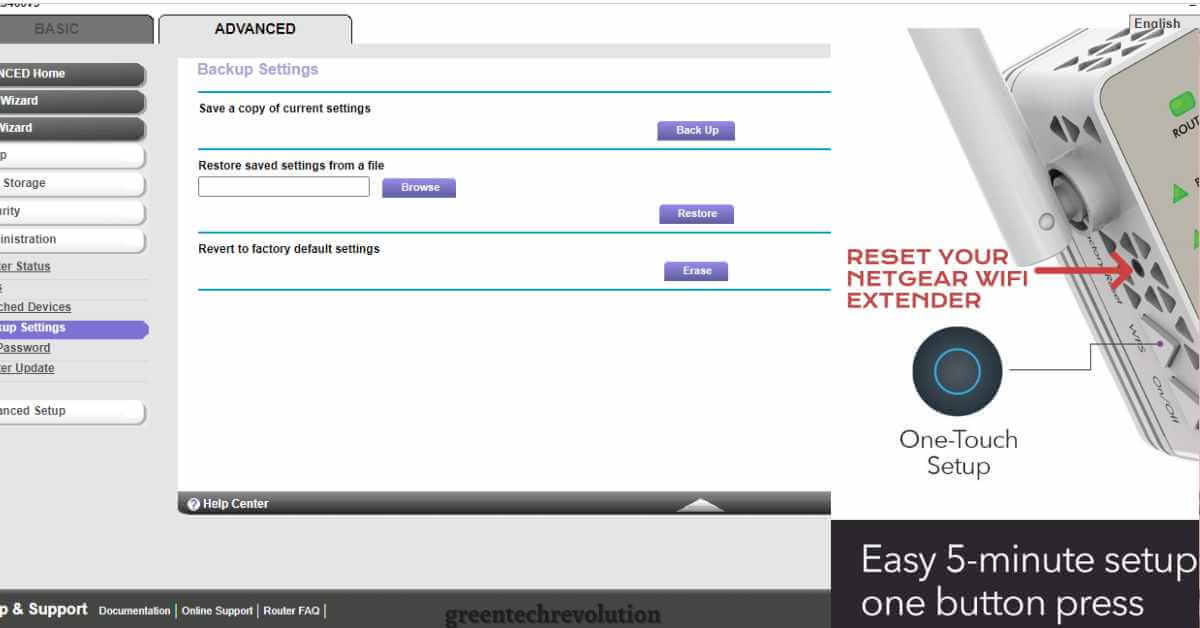
Step 8: Reconfigure the Extender Once the extender has rebooted, you’ll need to reconfigure it. Access the extender’s web interface using a web browser on your connected computer or mobile device. Enter the default IP address for your Netgear extender, which is typically “192.168.1.250.” Follow the setup wizard to configure your extender with your network settings, including your home WiFi network name and password.
Step 9: Reconnect Your Devices After configuring your extender, reconnect your computer or mobile devices to the extended network using the new settings you just entered during the setup process.
Step 10: Test the Connection Finally, test the extended network connection to ensure it’s working as expected. Walk around your home and check for a strong signal in areas that previously had poor coverage. If needed, make adjustments to optimize your network’s performance.
That’s it! You’ve successfully performed a factory reset on your Netgear WiFi extender and reconfigured it for improved network coverage.
Post-Reset Configuration
After successfully resetting your Netgear WiFi extender, it’s time to reconfigure it and restore your network connectivity.
- Access the Default Settings: Open a web browser on your computer or mobile device and enter the default IP address for your Netgear extender (often something like ” 192.168.1.1” or “192.168.0.1” or “192.168.1.250”) into the address bar. This will take you to the extender’s web interface.
- the Netgear Extender: You’ll need to go through the setup wizard again, which will guide you through configuring your extender’s settings. This typically includes selecting your home network, entering the Wi-Fi password, and customizing network preferences.
- Connect to the WiFi Extender: Once you’ve configured the extender, reconnect your devices to the newly extended network. Your extender should now be broadcasting an extended Wi-Fi network with the settings you’ve just configured.
- Test the Extended Network Connection: Finally, test your extended network connection to ensure everything is working as expected. Check for a strong signal in areas that previously had poor coverage, and make any necessary adjustments to optimize your network’s performance.
Troubleshooting and Tips
While the factory reset process is generally straightforward, issues can sometimes arise. Here are some common troubleshooting steps and additional tips to ensure a smooth reset and optimal extender performance:
- Common Issues During the Factory Reset: If the LED indicator lights don’t respond as expected, try holding the reset button for a longer or shorter duration. Be patient, as the reset process may take a minute or two to complete.
- Additional Troubleshooting Steps: If you encounter difficulties during the setup process after the reset, double-check your network settings, passwords, and firmware updates. Ensure that your extender is running the latest firmware for improved stability.
- Tips for Maintaining a Stable Extender Connection: To maintain a stable connection, place your extender in a central location between your router and the areas with weak Wi-Fi coverage. Avoid interference from other electronic devices and regularly reboot both your router and extender to keep your network running smoothly.
Final Thoughts
By following the simple steps outlined in this article, you can give your Netgear WiFi extender a fresh start and experience optimal performance once again. A factory reset is often the best solution when faced with issues like connectivity problems or forgotten passwords. This process not only restores the device to its default settings but also clears away any potential software glitches that may be hindering its functionality.
With a clean slate, your Netgear WiFi extender can provide you with uninterrupted Internet access throughout your home or office. You can say goodbye to dead zones and frustratingly slow connection speeds. A fresh start means improved signal strength, enhanced coverage, and seamless streaming for all your devices.
So why wait? Take advantage of this opportunity to reset your Netgear WiFi extender today and enjoy the benefits of a reliable, high-performing wireless network once more. With just a few clicks, you can say hello to a hassle-free online experience that meets all your browsing needs – whether it’s working from home, streaming movies, or gaming with friends. Don’t let technical difficulties hold you back; embrace the power of a fresh start with your trusted Netgear WiFi extender!


Leave a Reply
You must be logged in to post a comment.