Connecting your computer to a network is easier than it seems, whether you’re using a wired or wireless setup. You just need the right cables, a reliable internet source, and a few simple settings. In this step-by-step guide, I’ll walk you through the process to ensure your device gets online quickly and securely.
How to Connect a Computer to Network: Step-by-Step Guide
Step 1: Determine Your Network Type
Before connecting your computer to a network, identify whether you want to use a wired (Ethernet) or wireless (Wi-Fi) connection. Each method has its advantages and applies to different scenarios.
- Wired (Ethernet) Connection: Ideal for consistent speeds and reliability, commonly used for desktops or when high bandwidth is needed.
- Wireless (Wi-Fi) Connection: Offers flexibility and convenience, perfect for laptops, tablets, and mobile devices within range of a wireless router.
Step 2: Gather Necessary Equipment
- For Wired Connections:
- Ethernet cable (Cat5e or Cat6)
- Network switch or router with available LAN port
- Computer with an Ethernet port
- For Wireless Connections:
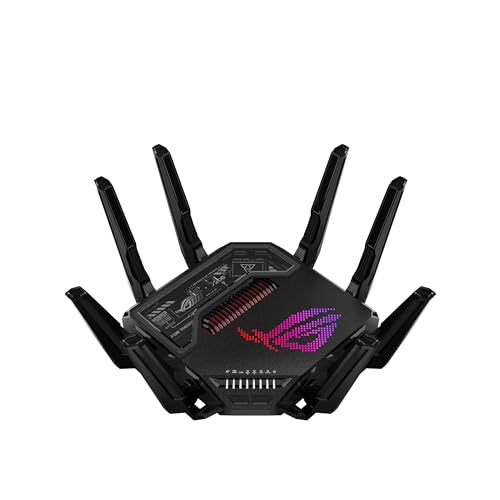
- Wireless router or access point
- Computer with built-in Wi-Fi adapter or external USB Wi-Fi adapter
- Wi-Fi network name (SSID) and password
Step 3: Connect via Ethernet (Wired Network)
- Plug in the Ethernet Cable
Insert one end of the Ethernet cable into your computer’s Ethernet port and the other end into an available LAN port on your router or network switch. - Power On Devices
Ensure both the computer and the networking equipment (router/switch) are powered on. - Check Connection Status
On Windows, look for the network icon in the system tray. On macOS, check the Ethernet symbol in the menu bar. Both should indicate a successful connection if the cable is properly inserted. - Verify Network Access
Open a web browser and navigate to a website to confirm internet access. If you only need access to a local network, try accessing a shared folder or printer on the network.
Step 4: Connect via Wi-Fi (Wireless Network)
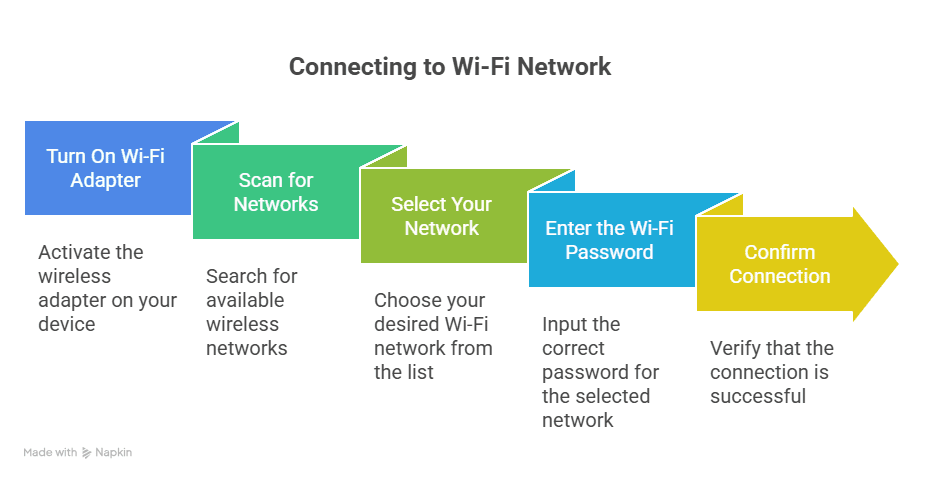
- Turn On Wi-Fi Adapter
Many laptops enable Wi-Fi by default. If not, use the function key (such as Fn + F2) or toggle switch to turn on the wireless adapter. For desktops with external adapters, plug in the device and install any required drivers. - Scan for Networks
Click the network icon in your system tray (Windows) or menu bar (macOS). A list of available wireless networks (SSIDs) will appear. - Select Your Network
Choose your Wi-Fi network from the list. If your network is hidden, select “Other” or “Join Other Network” and manually enter the SSID. - Enter the Wi-Fi Password
Type in the correct network security key (WPA2/WPA3). Click “Connect” or “Join.” - Confirm Connection
The network icon should indicate a successful connection. Test your connection by opening a website or accessing a network resource.
Step 5: Configure Network Settings (If Needed)
Most home networks use DHCP to automatically assign IP addresses, but some setups require manual configuration.
- Automatic IP Assignment (DHCP): By default, computers set their network adapters to obtain settings automatically. No additional steps are necessary unless your network uses static IP addresses.
- Manual IP Assignment: If instructed to use a static IP, follow these steps:
- Windows:
- Open Control Panel > Network and Internet > Network and Sharing Center > Change adapter settings.
- Right-click your network connection and choose Properties.
- Select Internet Protocol Version 4 (TCP/IPv4) and click Properties.
- Choose Use the following IP address and enter the required information.
- macOS:
- Go to System Settings > Network.
- Select the active network connection (Wi-Fi or Ethernet).
- Click Details, then TCP/IP.
- Change Configure IPv4 to Manually and fill in your IP address, subnet mask, and router address.
- Windows:
Step 6: Troubleshoot Connection Issues
If your computer does not connect to the network, follow these troubleshooting steps to identify and resolve common problems.
- Check Physical Connections: Ensure that cables are securely plugged in and that the router or switch is powered on.
- Restart Devices: Reboot your computer and networking equipment to clear temporary errors.
- Verify Network Credentials: Double-check the Wi-Fi password or static IP settings for accuracy.
- Update Network Drivers: Outdated or missing drivers can cause connection problems. Download the latest drivers from your computer or adapter manufacturer’s website.
- Run Network Troubleshooter:
- Windows: Go to Settings > Network & Internet > Status and select Network Troubleshooter.
- macOS: Use the Wireless Diagnostics tool by holding Option and clicking the Wi-Fi icon.
- Check Router Settings: Log into your router’s web interface and confirm DHCP is enabled and the correct settings are applied.
Step 7: Connect to a Network in a Business or School Environment
When connecting to a workplace or school network, you may encounter additional security protocols. Follow these guidelines to join such networks safely and efficiently.
- Obtain Network Credentials: Contact your IT department for the correct network name, password, and any specific configuration instructions.
- Install Required Software: Some networks require VPN clients, authentication software, or security certificates. Install these applications as instructed.
- Configure Security Settings: Set up any necessary encryption, proxy server information, or domain authentication as specified by your organization.
- Register Your Device: Some networks use MAC address filtering or require device registration. Provide your computer’s MAC address to the network administrator if needed.
Step 8: Set Up File and Printer Sharing
Once connected, you may want to access shared files or printers on your network. Set up sharing features to make resources available across connected devices.
- Windows:
- Go to Control Panel > Network and Sharing Center > Advanced sharing settings.
- Enable Network discovery and File and printer sharing.
- Share specific folders or printers by right-clicking the item, selecting Properties, and configuring sharing settings.
- macOS:
- Open System Settings > General > Sharing.
- Enable File Sharing or Printer Sharing.
- Add folders or printers to the shared list and set user permissions as needed.
Step 9: Secure Your Network Connection
Protect your computer and network by following essential security practices.
- Use Strong Passwords: Choose complex passwords for both Wi-Fi and device logins to prevent unauthorized access.
- Enable Network Encryption: Set your wireless router to use WPA2 or WPA3 encryption.
- Update Firmware and Software: Keep your router and computer operating system updated with the latest security patches.
- Disable Unused Services: Turn off features like guest networks or remote management if not needed.
- Install Security Software: Use antivirus and anti-malware programs to protect against threats.
Step 10: Advanced Networking Options
For users who want more control or need specialized configurations, explore advanced networking features.
- Set Up a Static IP Address: Assign a fixed IP to your computer for applications like remote desktop, servers, or port forwarding.
- Configure VLANs: Large networks may use VLANs to segment traffic for security or performance.
- Use Quality of Service (QoS): Prioritize certain types of network traffic, such as video calls or gaming, for better performance.
- Establish a VPN Connection: Access remote networks securely by setting up a Virtual Private Network (VPN) client on your computer.
- Monitor Network Activity: Use built-in or third-party tools to track bandwidth usage, connected devices, and potential intrusions.
Step 11: Connect to a Network Using Command Line
Advanced users may prefer connecting to a network using command line tools for scripting or troubleshooting purposes.
- Windows Command Prompt:
- Check Network Interfaces:
ipconfig - Release/Renew IP Address:
ipconfig /releaseandipconfig /renew - Connect to Wi-Fi:
netsh wlan connect name="SSID"
- Check Network Interfaces:
- macOS Terminal:
- List Interfaces:
ifconfig - Connect to Wi-Fi:
networksetup -setairportnetwork en0 SSID PASSWORD
- List Interfaces:
- Linux Terminal:
- Connect Using nmcli:
nmcli device wifi connect SSID password PASSWORD - Check IP Address:
ip addr show
- Connect Using nmcli:
Step 12: Maintain Your Network Connection
Keep your network connection stable and reliable by performing regular maintenance.
- Restart Your Router Periodically: Reboot your router every few months to refresh its memory and maintain performance.
- Check for Firmware Updates: Log in to your router’s web interface and apply updates when available.
- Monitor Connected Devices: Review the list of connected devices to spot unauthorized access.
- Review Security Settings: Update passwords and review encryption standards annually or after any security incident.
Step 13: Connect Multiple Devices
Extend your network to support multiple computers, mobile devices, and smart home equipment.
- Use a Network Switch: Expand the number of available Ethernet ports for wired connections.
- Add Wi-Fi Range Extenders: Improve wireless coverage in larger homes or offices.
- Set Up Guest Networks: Provide internet access to visitors without exposing your main network.
- Implement Parental Controls: Manage internet access schedules or content for specific devices.
Step 14: Document Your Network Setup
Keep a record of your network details for future reference or troubleshooting.
- Write down Wi-Fi SSID and password.
- Note static IP addresses and device MAC addresses if used.
- Record the router admin username and password in a secure place.
- List connected devices and their roles (e.g., printer, server, laptop).
Summary of Key Steps on How to Connect a Computer to Network
- Identify your preferred connection type: wired or wireless.
- Assemble all necessary equipment and credentials.
- Follow operating system-specific instructions for setup.
- Apply security best practices for safe networking.
- Document your configuration for easier troubleshooting and maintenance.
How to set up network sharing in Windows 10 and share files, folders between computers.Easily!
Frequently Asked Questions
What equipment do I need to connect my computer to a network?
You need a network adapter (built-in or external), a router or modem, and either an Ethernet cable for wired connections or Wi-Fi access for wireless connections.
How do I connect my computer to a Wi-Fi network?
Click the network icon on your computer’s taskbar, select your Wi-Fi network, enter the password, and confirm the connection.
How can I set up a wired Ethernet connection?
Plug one end of an Ethernet cable into your computer’s network port and the other end into your router or modem. Your computer should detect the connection automatically.
What should I do if my computer doesn’t detect the network?
Check your network cables or Wi-Fi adapter, restart your router, and make sure your network drivers are up to date.
How do I find my computer’s IP address after connecting to a network?
On Windows, open Command Prompt and type “ipconfig.” On Mac, go to System Preferences > Network and select your active connection to view the IP address.
Is it safe to connect to public Wi-Fi networks?
Public Wi-Fi networks are less secure. Avoid accessing sensitive information and use a VPN for added protection when connected to public networks.
Can I connect multiple computers to the same network?
Yes, you can connect multiple computers to a single network using a router, either through Ethernet cables or Wi-Fi.
Final Thoughts
Connecting your computer to a network involves checking hardware, configuring network settings, and verifying the connection. By following these steps on how to connect a computer to network, you ensure smooth access to the internet and shared resources. Regularly updating your drivers and security settings keeps your connection stable and secure, making online tasks efficient and reliable.


Leave a Reply
You must be logged in to post a comment.